
Welcome to week 2 of the Stitch Magic Stitch-Along! Today we’re talking pintucks, a beautiful design detail to add texture and interest to your sewing projects. This chapter begins on page 55 of Stitch Magic by Alison Reid. Do check it out, as there are tons of great ideas plus two beautiful projects—a table runner and a very cool tote bag.
First, let’s talk about the method that the author uses, which is a twin-needle pintuck with a special pintuck foot on your sewing machine. (Don’t worry if you don’t have these supplies, I’ll give you hand and machine alternatives later in this post.)
Pintucking with a Twin Needle and a Pintuck Presser Foot
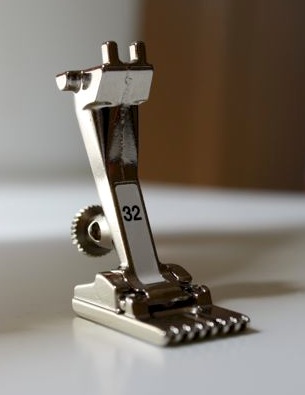
Install the foot and needle in your machine, and thread two spools of all-purpose thread in your upper thread mechanism. (Yes, I just wrote the word thread three times in a sentence. It couldn’t be helped, I’m afraid!) It’s just like threading as normal, but with two strands, which then go into the two separate needles. You can use different colored threads if you like, which will give you a different color of stitching on each side of your tuck.

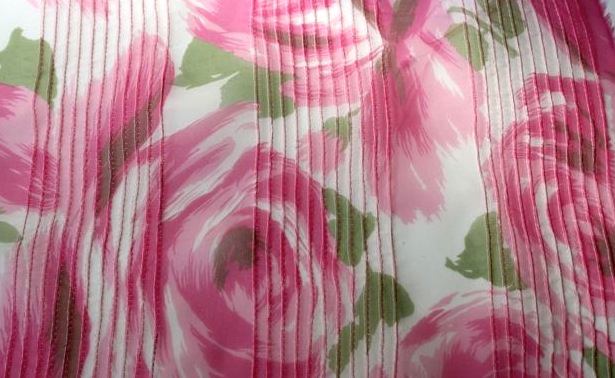
Grab some test fabric. I’m using 10” tall strips of muslin that I can cut down into 10” squares once I’m done experimenting. (The idea is that we’ll have a bunch of 10” samples at the end of the Stitch-Along. For this exercise, you need to cut the squares down to size after stitching, since the tucks make the fabric smaller. Make sense?)
Now, just sew as you normally would! Start by sewing down the lengthwise grain of the fabric in rows. A tuck forms in the groove of your foot as you sew. When you go on to the next tuck, your first tuck should go into a parallel groove on your foot to keep the tucks evenly spaced.
Try making groups of tucks.

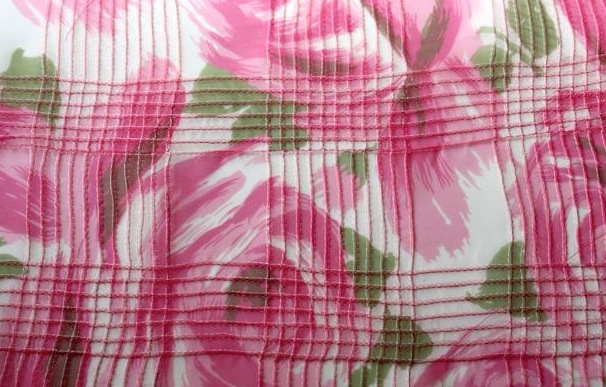
Experiment with printed fabric too. I’m using a beautiful floral silk organza here. Make perpendicular groups of tucks for a plaid effect. I love this look! I will definitely be doing this when I finally make this fabric into a dress.
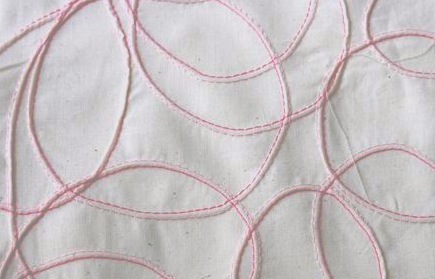
Next, try some creative loops and curves. When you’re using a pintuck foot, you don’t have to tuck along a straight grain. Go crazy! This would be a fun effect for whimsical home décor, especially in a child’s room.
You can try all sorts of experiments with your pintuck foot: using stripes, prints, curved tucks, and different spacing options. Have fun!
Machine Tucks with a Single Needle
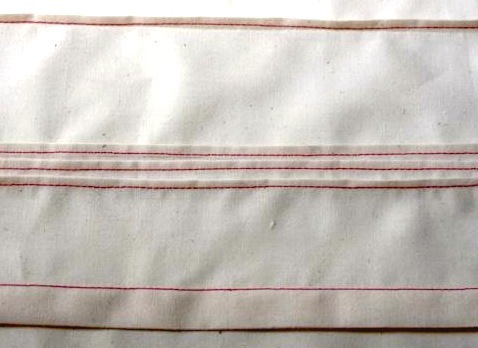
You don’t need a twin needle and pintuck foot to make pintucks. In fact, “authentic” pintucks (such as those used in historical costumes and heirloom sewing) are made by pressing the fabric in a fold and sewing along the fold with a single needle. This method is best used only on the straight grain of the fabric.
Start by marking your line with chalk or disappearing ink and then press the fabric on your line. Stitch 1/8” (or however far you choose) from the fold. Press the tuck to one side. That’s it!

Try groups of pintucks. To get evenly spaced tucks, mark all the lines on your fabric first, before you begin tucking. The distance between the lines should be the desired width between tucks plus two times the finished tuck width.
You can try bigger tucks too! (Though these aren’t technically pintucks anymore, just regular old tucks.) I had a dress from Anthropologie that had a series of big tucks placed horizontally around the hem. It was so cute! I tried out a 5/8” tuck on the bottom of my sample below.
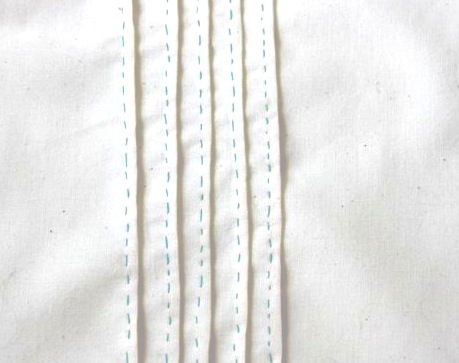
Pintucks by Hand
You can also recreate this effect by stitching along the fold by hand rather than machine. Use the technique above, but substitute a running stitch by hand for the machine stitching. Use tiny stitches and press to one side.
Aren't pintucks fun? I can't wait to incorporate them into some garments. To do this, you'll likely want to pintuck your fabric first, and then cut out your garment pieces.
I hope you’ve enjoyed this installment of the Stitch-Along. How are your samples going?